
Guest article written by Barbara Tischler, Owner of The Clutter Coach, an organizing service for home and office
Is your home office buried in clutter? Could your workspace use a little more organization? Whether you work from home or only use a home office for household business, the methods for achieving and maintaining an organized home office space are the same.
But before you read on for the details, you may be wondering why you should have an organized home office. Reorganizing your home office will take time and effort, so it had better be well worth it, right?! Well here are the benefits:
- You will be able to find specific items quickly and easily (e.g., you won’t have to waste time digging through piles of paperwork to find the one document you need at the moment).
- You will be more productive.
- You will make a good impression on any people who see your work area, such as friends, family, and clients, and employees.
- You will benefit psychologically by facing a neat and attractive workspace at the beginning of each day, and by being better able to focus on your work because there aren’t as many visual distractions.
Hopefully, you are now convinced that it is to your advantage to have an organized home office space. So next, I will describe the step-by-step process I recommend for getting it organized.
- Divide your home office into sections, such as desk, filing cabinet, bookcase, supply cabinet/closet, etc.
- Working on only one section at a time, pull everything (except perhaps very large items, such as computers or printers) off and out of that space.
- Now you can clean the space. Wipe down and dry the surface, the drawers, and all the nooks and crannies (what was that gunk in the back of the drawer?).
- Using boxes or bags as containers, sort items and group similar items together. Use the following group breakdown as an example and tailor it to fit your particular possessions:
- Supplies: pencils/pens, paper clips, rubber bands, post-it notes, white out, stapler, etc.
- Equipment and their accessories: computer, printer, telephone, flash drives, etc.
- Filing materials: manila file folders, hanging file folders, tabs, etc.
- Fileable items: account information, forms, letterhead, completed projects, etc.
- Paperwork that requires action: things to read, bills to pay, calls to return, projects, etc.
- Reference materials: books, manuals, catalogs, price lists, binders, etc.
- Organizing accessories: paper trays, pencil cup, desk pad, bins, etc.
- Items you need in front of you for easy viewing: company phone list, cheat sheets, etc.
- Knickknacks: framed pictures, work awards, etc.
- Items that go elsewhere
- Items to purge
Keep a recycle bin and garbage can nearby to get rid of things — especially paperwork — you don’t need. Here are some questions you can ask yourself to help determine what to toss.
- Is the item an unnecessary duplicate? If the answer is “Yes,” toss it!
- Is the item current and relevant to my work? If the answer is “No,” toss it!
- How often will I need to use or refer to this item? If “Never,” toss it!
- Does this item add anything to other information on hand? If “No,” toss it!
Now it is time to define a place for everything. In doing this, I suggest that you follow two principles: the Frequency-of-Use Rule and the Grouping/Separating Rule.
- The Frequency-of-Use Rule says that items should be placed according to how frequently you need to access them. Specifically, items that are accessed quite frequently (i.e., on a daily basis) should be placed within immediate reach/view, while things that are used less often (i.e., weekly, monthly, or yearly) should be placed further away so that they do not interfere with your daily work. So first, think about what items you need most at your fingertips when you work — e.g., computer, tablet, phone, headphones, frequently-accessed reference materials, company phone list, stapler, pens/pencils, paper clips, action items — and place these items in easy-to-access places in, on, or above your desk. Items that you use fairly frequently, but not every day — e.g., stamps, return address labels, envelopes, particular reference materials, account information – should be placed either in desk drawers, filing cabinets near your desk, or shelving above or near your desk. If you have a file drawer in your desk, you will want to use it to hold files, not other things! Finally, items that you rarely access — e.g., extra office supplies and infrequently-accessed files and reference materials — should be stored on shelves or in file and supply cabinets relatively far away from your desk.
- The Grouping/Separating Rule says that similar items should be placed together, while dissimilar items should be separated from each other. For example, put similar items together, such as paper clips, and separate them from dissimilar items, such as pencils. Also, items that are related to each other in function should be placed near each other. For instance, if you pay bills using your computer, store your bills to be paid near your computer.
Organize items in areas and containers designed to accommodate them. Here are some examples:
- Action items can be stored on your desktop either in (a) a paper tray, if you don’t have a lot of material or (b) multiple stacking paper trays or a vertical file holder if you have enough material to sort into different categories, such as priority levels or types of activities (e.g., TO DO, TO PAY, TO ENTER, TO READ). If much of what you do is date related, you can also use a tickler system composed of one file folder for each day of the week, month, or year. In such a system, you store action items in the folders that correspond to the days on which you need to complete the items.
- Store supplies like paper clips, rubber bands, pencils/pens, scratch paper, post-it notes, and white out in desktop supply caddies or drawer divider trays designed to organize such items.
- Arrange the items you need for clear viewing under a clear desk pad or in an orderly fashion on a tackable board over your desk (do not attach items directly to the wall, since this tends to look a bit tacky and removing something may damage the wall covering).
- Store most books on bookcases.
- Determine if you can make better use of vertical space. You may need to buy taller filing cabinets and/or bookcases. You may determine that you can make better use of a closet by de-cluttering it and using it for your home office needs – for example, there may be clothing in the closet that can be moved elsewhere or given away, and then you can use the space for storing office supplies, instead.
- File papers in filing cabinets/drawers.
Organizing your files comes down to categorizing and subcategorizing:
- When you categorize, use broad “umbrella” headings that will be easy for you to remember, such as Banking, Investments, Insurance, Medical Records, Taxes, etc.
- If your category has a main topic and a word that describes it, use a “topic-modifier” format (e.g., Insurance-Car, Insurance-Health). That way, all your files of the same topic will be filed near each other (assuming you are arranging your files alphabetically). When a file gets to be more than about ¾” thick, start a second file with same name or use a box-bottom file folder for everything in that category. I recommend that you use hanging file folders for categories and manila file folders for subcategories. I like this system because it isn’t possible to subdivide a manila file folder, but it is possible to subdivide inside a hanging file folder by using manila folders inside the hanging folders.
- When should you use subcategories? When a category has a lot of slightly different information in it and you are having a hard time finding what you need, it makes sense to subdivide the category into subcategories (e.g., Medical Records-Sara, Medical Records-Joe). Include the category name on the file tab so you know what category it goes into if you were to remove the file and then re-file it.
- If you are sharing files with someone else in your household, you will need to agree on a filing system. All too often, I see multiple files made up for the same exact category, but with different file names (e.g., Checking, Bank of America account, and Banking).
- I suggest that you alphabetize your files based on category names. If you’d like, you can designate a particular file drawer or drawers for a particular super-category, such Financial, and alphabetize your category files within that super-category. Or you can simply alphabetize by category, going from one drawer to the next in ABC order.
- One optional idea is to create an index list or table of contents for your files. That way, you can quickly scan the list to see if you already have a file made for a particular type of document, or you can quickly look on the list to see where a particular file is located in the grand scheme of all your files.
- I recommend that you insert the plastic tab for the hanging file folder on the front flap of the folder. That way, when you find the file you want, all you have to do is grab it, and pull it up and toward you to gain access to the front contents of the file. If the tab is inserted in the back flap, then you have to hunt around for the front of the file.
- I recommend creating a Holding or Pending file (this can also be a drawer or cubby hole instead of a file). This can contain anything that you do not need right now, but you will need later on, such as tickets to an upcoming show or directions to an event you will be attending. A Holding/Pending file is also a convenient place to store receipts for mail order items you are waiting to receive or papers you are waiting to process once you hear back from someone. Periodically, you can thumb through your Holding/Pending file to see if you need to follow up on any issues that have yet to be resolved.
- If necessary, reduce the number of knickknacks to a minimum (you don’t need five pictures of your kids), and place them in areas that will not interfere with your work.
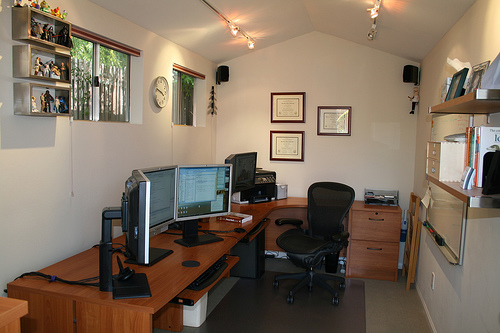
You may want to rethink the layout of your home office space. Keep in mind things like lighting, ease of accessing frequently-used items, and making the most of the space you have. If you have a short cabinet, table, or bookcase, put that under a window and save the full wall spaces for taller storage pieces.
If you working from home (especially for the first time), you may be wondering about the best placement for a workspace in your home. I recommend a space that is private, where you can close a door, if possible. This will reduce distractions for not only you, but for others in your house. And if you have young children, being able to close your door is a must! If there isn’t already a designated office/den/study in your home, you may need to carve out a new spot to be used as an office. This might mean finding a spot in your basement, guest room, or a corner of your bedroom. If none of these places work, you may need to set up shop in your dining room, living room, or kitchen. If there is no door to get privacy, you may need to get creative! For example, you can post “office hours” and ask that other people not disturb you during those times.
I have two final recommendations for you to keep in mind as you organize. One is to leave some clear space on the desktop for writing purposes and to give your desk a tidy appearance. The other tip is to make use products to help you get organized. There are numerous office organizing products around — e.g., paper trays, drawer divider trays, office supply caddies, shelf dividers, filing cabinets, etc. – and items/furniture that utilize vertical space. You may already have some of these, but don’t be afraid to purchase something new if it will help you get more organized.
Once you’ve organized your home office space, you’ll want to keep it that way. I have the following suggestions for maintenance:
Do it now!
- Make an immediate decision about what to do with each item that comes into your home office. Resist the temptation of saying to yourself, “I’ll just put it here for now.” Put the item in its proper place, whether that’s in a particular drawer, in a particular paper tray, on a particular shelf, in the trash/recycle bin, etc. You can use the questions listed above to help you decide if you should toss an item.
- Do small tasks right away vs. putting them off (unless it will disturb what you’re in the middle of); otherwise, write down the task (write it in your calendar, if this works best for you).
- Put things back in their proper places as soon as you are done using them.
- Make appointments with yourself to go through your files at least once a year to purge any old information.
- Since putting items away immediately after using them isn’t always possible, I strongly recommend that you straighten up/clean up your home office at the end of each day. It only takes about five or ten minutes and it is much easier to clean up a day’s worth of mess than a week, month, or year’s worth.
HAPPY ORGANIZING!